How to tie a ribbon scarf?

Watch the video

Many needlewomen are thinking about howto tie a ribbon scarf. This increased interest is due to the fact that knitting from ribbon yarn is one of the easiest ways to quickly perform a spectacular product. Find out how knitting scarves tapewools with knitting needles and crochet.
How to crochet a scarf from ribbon yarn
To connect such fashionable and beautiful scarf it is possiblein just a couple of hours. To do this you will need: 250 gr. ribbon yarn, hook number 4. The process of knitting a scarf begins with tying 15 air loops and 3 loops with a crochet instead of a column for the first row. Then you need to link 2 more air loops, skip 2 air loops in the chain and on the third row connect the column with the spool. So you should knit to the end of the row. All subsequent series should be repeated in the same way. Get a grid.
Next, you need to start knitting the scarf along the scarf: simple columns without a crochet. The next row is already knitted with crochet stitches, increasing the number of loops twice. Then the knitting pattern of the two rows repeats. The last row is knitted with crochet stitches, increasing the number of loops by 1.5 times, that is, from the two loops of the previous row, 3 loops should be tied. An openwork scarf made of ribbon yarn is ready and can decorate any wardrobe.
How to knit a scarf from ribbon yarn
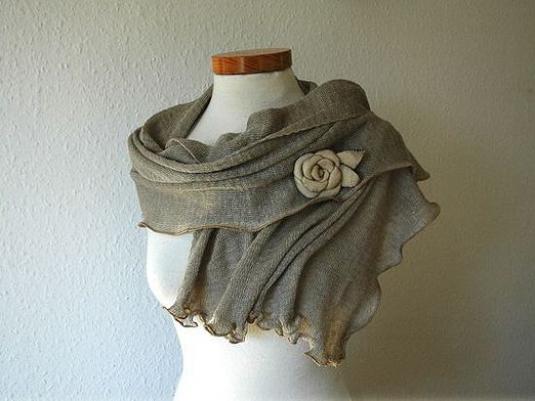
One of the most spectacular products related toribbon-shaped yarn - a magnificent scarf-toad. It can perfectly be used for a variety of clothing elements or act as an independent detail. To do this you will need: 100 gr. ribbon yarn and thick knitting needles No. 8.
It should be noted that the principle of knitting ribbonyarn is very simple. It is necessary to grasp the upper edge arches, right, working, spokes. The yarns arc can be fused with face loops, either through one or through two loops. Everything depends on the intended form of the product. If you want your jeans scarves to turn out not to be very pronounced, then each yarn loop should be grasped.
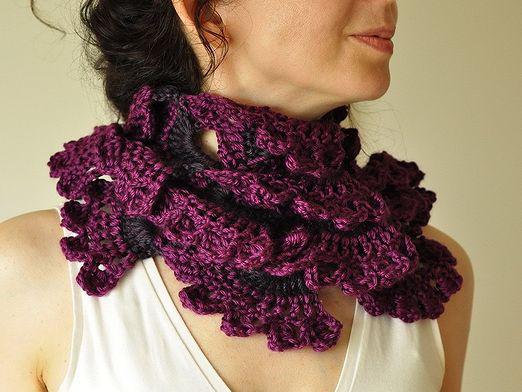
Now we knit a scarf of ribbon yarn with ruffles
First you need to string every secondthe upper loop on the straight spoke. In order to make it easier to distinguish the arc, it is necessary to stretch the end of the ribbon yarn. To insert the needle, follow the thread from right to left, then the spoke, with the formed loop, must be moved in the opposite direction from itself. Thus, six loops should be tied. Next, the first arc of the row must be tied with a conventional face surface. At the same time, the right knitting needle must be inserted behind the top wall of the hinge. Then you need to tie two loops together and toss them on the spoke. So it should be done until there is no one loop, which will need to stretch the rest of the thread and tie a knot.
Pay attention to one important point inprocess of knitting, we will consider some features of how to tie a ribbon scarf. The fact is that in the process of working with this type of yarn you need to carefully unwind the hank. It must be ensured that the tape does not twist into a spiral. Otherwise, the scarf will not have the same appearance on both sides. Also it is necessary to carry out both direct and reverse rows solely with facial loops, and the braid is always wound up for work. Though you might think that this robot at first is rather complicated, do not despair, in 15 minutes you will become a master! In the case where you need to tie several rows of ruches, it is best to work in two strings. It will be necessary to carry out two canvases of ribbon yarn, and the next pair - a thin cotton yarn having a tone of braid. In this case, the folds will lie in neat rows.
As you can see, tie a scarf from ribbon yarn is quite simple. Also you will be helped to tie a scarf from ribbon yarn - the video below.
Now you can definitely tie such a fashionableAn accessory, like a scarf made from ribbon yarn. Here are examples of how for crochet lovers, and for masters of spokes. Choose the appropriate material and color for your scarf, get yarn, and go!