How to make a swan out of modules?

Watch the video

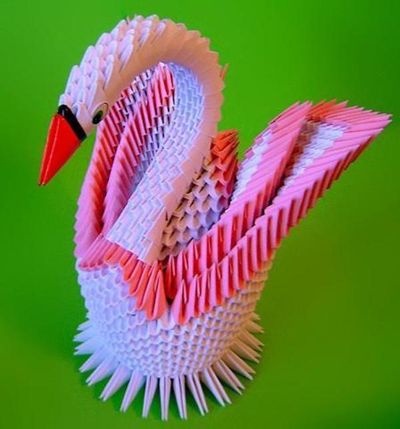
An unusual technique for making crafts frompaper modules - modular origami - was invented in China. It is an assembly of various figures from the set of preforms-modules that are connected by inserting them into each other. One of the most beautiful crafts is origami swan from the modules.
What will it take to make a swan out of the modules?
Before you make a swan from the modules, you must prepare everything you need for this job in advance:
- The paper is white (it should be thick enough, but not cardboard);
- paper colored (of the same quality as white);
- scissors;

- glue;
- a simple pencil;
- ruler.
When tools and materials are prepared, modules will have to be made. To assemble a white swan, you need to procure 458 white modules and one orange or yellow (for the beak). Make them not difficult:
- Sheet A4 should be delineated into 16 identical rectangles, cut them.
- Each rectangle is folded along the long side in half, then again in half along the short side and unbend back, denoting the vertical axis of symmetry.
- It is necessary to bend the upper corners so that both halves of the upper edge of the rectangle lie on the axis of symmetry.
- Bend the lower corners to the top was a triangle, while leaving a small gap between the base of the triangle and the bent corners.
- Bend the bottom of the workpiece so that it lies on a triangle and fold it along the axis of symmetry to an angle of 90 degrees.
Modules are best done all at once, so that during assembly do not be distracted by their workpiece.
Swan of modules: step by step assembly instruction
After making sure that all modules are ready, you can proceed to assembly by following the instructions:
- You need to take three triangle modules and insert the corners of the two modules into the two pockets of the third one. The following two modules should also be attached to the first group.

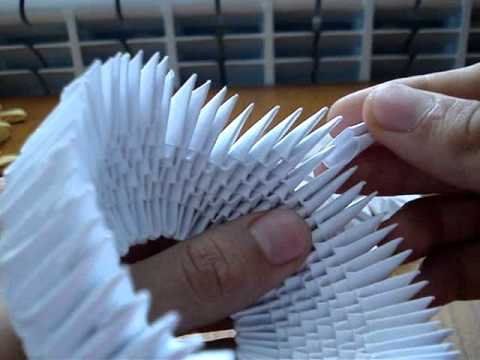
- As described above, it is necessary to carry outa ring consisting of two rows: external and internal. In the inner row, the modules will stand on the short side, and in the outer row on the long side. The ring requires 30 modules. They need to be collected by a chain, which the last module closes into the ring.
- Similarly, add the second, third and fourth rows of our ring, putting the modules on each other in staggered order.
- Carefully take hold of the edges of the resulting ring and make a move,
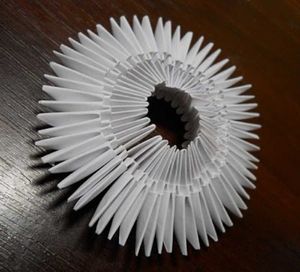
- Lay out the sixth row in which the modules followinsert it from above (it will also consist of 30 modules). Particular attention should be paid to the location of the modules: it should be the same as in all other rows.
- To "lay" the wings of the future swan, you needchoose the side on which his head and two corners (from two adjacent modules) will be located - here the neck will be fastened. Then, on both sides of these two corners, lay out on a row of 12 modules. Thus, the seventh row of the structure should consist of twenty-four modules and two gaps.

- When laying out the wings, each next row must be shortened to one module. So, in the eighth row should be 22 modules (from two sides to 11), in the ninth - 20, in the tenth row -18.
- When there are 2 modules in the eighteenth row, the wings will be ready. They can be shaped like this: from the bottom it is convex, and slightly bent at the top.
- The tail of the swan should be collected like wings (by reducing the row by one module in each row).
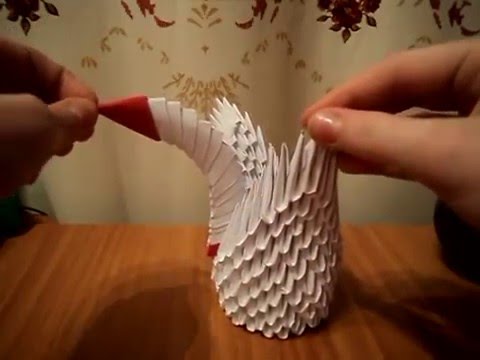
- When making the neck of the swan, modules are requiredConnect so that the two corners of one module fall into the other two pockets. This design is easy to give the desired bend. At its end, you need to attach a beak from the orange module, the corners of which are better to paste so that they do not split. Then the neck should be planted on those two corners that were left earlier between the wings.
The design should be strong and without the use of glue, but if you want to make it even stronger each module can be planted on the glue.
How to make a swan from the beautiful modules
The swan from the modules is an elegant piece and itselfitself. However, there are ways to make the swan of the modules even more beautiful. This can be achieved with the help of colored paper or paints: for example, by making a bright rainbow swan from a colored
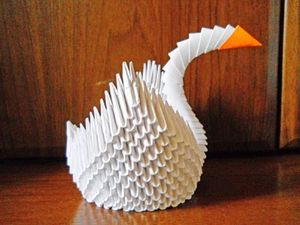
It is not difficult to make a swan out of modules, for thisonly patience and accuracy are needed. The resulting swan from the modules can serve as an excellent element of the decor of the room, or become a toy for the child. And it is possible that this particular piece of art will open somebody's way to the amazing world of modular origami.

